

3rd Baby’s Room – Redesigned all for under $200
I am a blessed mama of three beautiful girls, which means I have decorated, coordinated, and organized a nursery three times over the last six years! That process could have been incredibly expensive if I would have done each nursery from the ground up, but I quickly came to the realization that three children also means there’s money coming out of somewhere at all times, so ain’t nobody got time for unnecessary spending! Time to breakdown the art of doing a nursery on a budget!

1st Baby’s Room – All new everything!
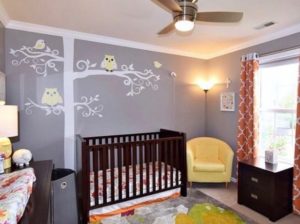
2nd Baby’s Room
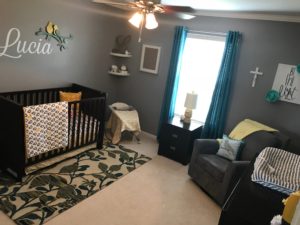
When I decorated the nursery for my first daughter, we went all out with brand new everything- brand new nursery furniture, brand new bedding and decor considering this was our first baby. However, by the time it came to preparing the nursery for baby number three, I knew that the concept of “new” was going to have to look a little different. The existing furniture had been deemed the nursery furniture with the expectation that one day the dresser and the night stand can be used in a guest bedroom (yet again, continuing to save us money on decorating a different space in the future). Seeing as I had the bedding from both my first and second daughters’ nurseries, I had some options of what direction the third nursery could take, so decided to add a little bit of a twist to update and refresh the look so regardless of what was chosen, it would appear new in style. Additionally, when we moved in nearly two years ago, we chose to paint all the bedrooms with Behr Marquis in Smokey Wings (eggshell), so not only was this a time saver at this point, but it was also a cost saver when it came down to it because we already had a beautiful base to build from.
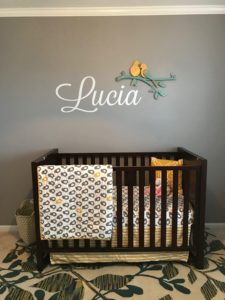
Crib with bedding from first baby and a special decal
I chose to use the Crate and Barrel’s (A.K.A. Land of Nod) bedding, “Not A Peep”, from baby number one for baby number three’s nursery decor. Along with that came a lamp, poof, and vases, and an area rug we had used in another bedroom at a different time that was just sitting in our basement. These ticket price items being accounted for meant that I would have some flexibility with my nursery on a budget bringing on a whole new look to the existing decor with some stops at local home decor stores, which excited me to my core!
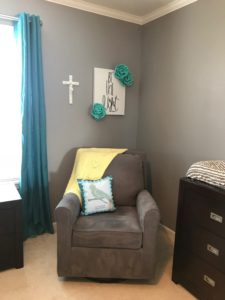
New window treatments, wall decor and a recliner (on clearance!)
First stop was to Target (as if that’s even a question), and that’s where I began to hunt for window treatments. I needed to ensure that they were light filtering for a darker sleep-encouraging ambiance, but also needed to be the perfect color for my little girl’s room. I found exactly what I needed at Target in the beautiful teal- toned beauties you see, and was able to snag them for only $19.99 each panel (plus 5% off with my RedCard, of course!). After a trip to Home Depot for the corner shelves ($19.99 each), Hobby Lobby and At Home for the decorative accents you see for $40, a wall decal from Etsy for $28, a gorgeous navy ottoman that doubles as storage from Meijer on clearance for $46, and (for the piece de resistance) a gorgeous rocking recliner from BuyBuyBaby on clearance for only $230 (which was graciously gifted to me, so cost us nothing out of pocket).
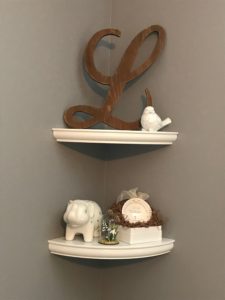
Corner shelves and new decor
All of these amazing details brought our third little girl’s room together for just under $164! It might have taken a lot of planning, strategizing, measuring, researching, shopping, returning, and patience to get the nursery just right, but it was beyond worth it! By putting in my due diligence I was able to create a beautiful space for my baby without a tight budget getting in the way. It goes to show that some serious creativity and a whole lot of inspiration can always go a long way!